DIY Pet Decor: Fun and Functional Projects
In this article, we will explore DIY pet decor projects that are both fun and functional. From creating cozy pet beds to building stylish pet feeding stations, making cat scratching posts, and crafting homemade dog toys, there are plenty of creative ideas to enhance your pet’s living space. Let’s dive in and discover how you can add a personal touch to your pet’s environment!
Key Takeaways
- Choose the right materials when creating a pet bed or feeding station to ensure durability and comfort.
- Sewing a custom pet bed allows you to tailor it to your pet’s specific needs and preferences.
- Adding extra comfort with cushions or pillows can make your pet’s bed even more inviting.
- Personalize your pet’s bed or feeding station with their name or unique designs.
- When making a cat scratching post or dog toy, prioritize safe and durable materials for your pet’s enjoyment.
Creating a Cozy Pet Bed

Choosing the Right Materials
When it comes to choosing the right materials for your DIY pet project, it’s important to consider both your pet’s comfort and your own needs. There are several common materials that you can use, each with its own advantages and considerations. Wood is a sturdy option that provides good insulation, especially if you choose cedar or redwood, which are naturally resistant to rot and pests. Plywood is a more economical choice, but it may not be as durable as solid wood. Pallets are a budget-friendly and eco-friendly option, but they may require additional treatment for weather resistance. Plastic is easy to clean and resistant to rot, but it may not offer as much insulation as wood. Finally, metal is durable but can become very hot or cold depending on the weather, so it’s not commonly used for the entire structure.
When selecting materials, it’s important to consider factors such as cost, durability, and weather resistance. For example, if you’re building a dog house, you’ll want to choose materials that can withstand the elements and provide insulation. Here are some additional tips to keep in mind:
- Use water-resistant materials: Choose woods that are naturally resistant to rot or treat the wood with a non-toxic water repellent.
- Elevate the structure: Keep it off the ground to avoid moisture.
- Sloped roof: This allows rain and snow to slide off easily.
- Overhangs: Extend the roof to prevent rain from entering the doorway.
- Caulk seams: Seal the seams of the house with silicone caulk to prevent drafts and moisture.
While not absolutely necessary, adding a door flap or panel to the dog house can help keep the elements out and provide extra insulation. It also gives your pet a greater sense of security.
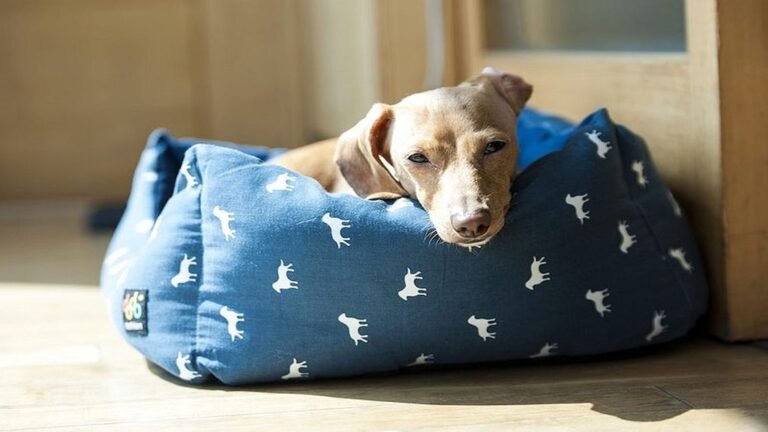
Sewing a Custom Pet Bed
When it comes to creating a cozy pet bed, sewing your own allows you to customize it to your pet’s needs and preferences. Not only is it a fun and rewarding project, but it also ensures that your pet has a comfortable and personalized space to rest. To get started, gather the materials you’ll need, such as soft and durable fabric, stuffing, and a sewing machine. Measure your pet’s dimensions to determine the size of the bed, and cut the fabric accordingly. Then, using your sewing machine, stitch the fabric pieces together, leaving an opening for stuffing. Once the bed is sewn, fill it with soft and supportive stuffing, making sure to distribute it evenly. Finally, sew the opening closed, and your custom pet bed is ready for your furry friend to enjoy!
Adding Extra Comfort with Cushions
By providing a soft and comfortable space for your cat to rest, you can help alleviate any pressure points they may encounter from hard surfaces. Additionally, hammocks can also help keep your cat cool, as they elevate them off the warm ground during hot weather.
Now that you understand the benefits of a cat hammock, it’s time to gather the necessary materials and get started on this exciting and rewarding DIY project. So, grab your sewing kit and let’s make a cat hammock that will have your feline friend purring with joy!
Personalizing Your Pet’s Bed
After creating a cozy pet bed for your furry friend, it’s time to add a personal touch to make it truly special. Petkin hemp products are a great option for adding a unique and eco-friendly element to your pet’s bed. These products are made from sustainable hemp fibers, which are not only durable but also provide natural odor control. By incorporating Petkin hemp products into your pet’s bed, you can create a comfortable and personalized space that reflects your pet’s individuality.
To further personalize your pet’s bed, consider adding a nameplate or embroidered initials. This small detail can make a big difference and give your pet’s bed a custom look. You can also use fabric paint or iron-on patches to add fun designs or patterns that match your pet’s personality. Don’t forget to include your pet’s favorite toys or blankets to make their bed even more inviting.
In addition to personalizing the bed itself, you can also create a cozy sleeping environment by choosing the right bedding. Opt for soft and washable materials that provide warmth and comfort. Consider using Petkin hemp products for bedding as well, as they are hypoallergenic and gentle on your pet’s skin. With a personalized bed and cozy bedding, your pet will have a comfortable and stylish space to relax and sleep in.
Building a Stylish Pet Feeding Station

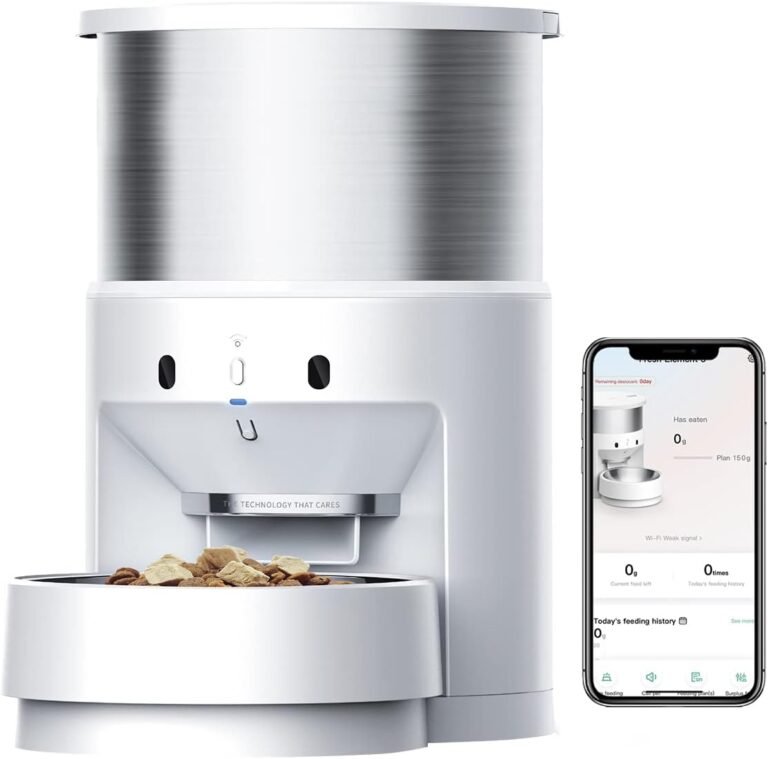
Designing a Functional Feeding Station
When designing a functional feeding station for your pet, there are several important factors to consider. First, choose the right materials that are durable and easy to clean. Look for materials that are non-toxic and safe for your pet to eat from. Second, think about adding storage for pet food and supplies. This will help keep everything organized and easily accessible. Third, consider customizing the feeding station to fit your pet’s needs. You can add features like elevated bowls for larger pets or a built-in water dispenser. Finally, don’t forget to incorporate your personal style into the design. You can paint the feeding station to match your home decor or add decorative elements that reflect your pet’s personality.
Choosing the Right Materials
When it comes to selecting the right materials for your DIY pet project, there are several factors to consider. Wood is a popular choice due to its sturdiness and good insulation. Cedar and redwood are particularly great options as they are naturally resistant to rot and pests. Plywood is a more economical choice, although it may not be as durable as solid wood. Pallets are a budget-friendly and eco-friendly option, but they may require additional treatment for weather resistance. Plastic is easy to clean and resistant to rot, but it may not offer as much insulation as wood. Lastly, metal is durable but can become very hot or cold depending on the weather, so it’s not commonly used for the entire structure.
When choosing materials, it’s important to consider your pet’s needs and the specific requirements of your project. For example, if you’re building a dog house, you’ll want to ensure it provides adequate insulation and protection from the elements. Here are some tips to keep in mind:
- Use water-resistant materials: Choose woods that are naturally resistant to rot or treat the wood with a non-toxic water repellent.
- Elevate the structure: Keep it off the ground to avoid moisture.
- Sloped roof: This allows rain and snow to slide off easily.
- Overhangs: Extend the roof to prevent rain from entering the doorway.
- Caulk seams: Seal the seams of the house with silicone caulk to prevent drafts and moisture.
While not absolutely necessary, adding a door flap or panel to the dog house can help keep the elements out and provide extra insulation. It also gives your pet a greater sense of security.
Adding Storage for Pet Food and Supplies
When it comes to creating a stylish and functional pet feeding station, storage is a lifesaver. Having a designated space to store your pet’s food and supplies not only keeps everything organized, but it also ensures that everything is easily accessible when you need it. There are several options for adding storage to your pet feeding station. One option is to incorporate built-in cabinets or drawers into the design. These provide a hidden storage solution that keeps everything out of sight. Another option is to use baskets or containers that can be placed on shelves or underneath the feeding station. These are great for storing smaller items like treats, toys, and grooming supplies. Whichever option you choose, make sure to consider the size and quantity of items you need to store, as well as the overall design aesthetic of your pet feeding station.
Customizing the Feeding Station
Whether you’re a seasoned DIYer or a novice, this guide provides all the essentials, including tips for optimizing comfort and airflow. Enhance your backyard and pamper your pooch with this unique and practical creation! Sizes: Customizable to fit your dog’s size. Supplies: Cedar fence pickets, 2×4 lumber, Simpson Strong-Tie exterior framing screws, Galvanized staples, Exterior paint (optional). Cost: Varies based on local prices and optional features. Difficulty: Intermediate. Total Time: Approx. (Specify hours/days). Special Instructions: Ensure the base is square before attaching trusses. Use middle screw holes for back tie plates to avoid interference with slats. Paint the base/frame before attaching the roof or slats if opting for a two-tone finish. Notes: Add a solar-powered fan for extra ventilation (optional). Adjust slat spacing based on your climate for optimal airflow.
Making a DIY Cat Scratching Post

Selecting the Right Materials
When it comes to selecting the right materials for your DIY cat scratching post, there are a few key factors to consider. Wood is a popular choice for its sturdiness and durability, with options like cedar and redwood being naturally resistant to rot and pests. Plywood is a more economical option, although it may not be as durable as solid wood. Pallets are a budget-friendly and eco-friendly choice, but they may require additional treatment for weather resistance. Plastic is easy to clean and resistant to rot, but it may not offer as much insulation as wood. Lastly, metal is durable but can become very hot or cold depending on the weather, so it’s not commonly used for the entire structure. Consider these factors and choose the material that best suits your cat’s needs and your design preferences.
Building a Sturdy Base
When building the base for your dog house, it’s important to take precise measurements and cut the materials accurately. Stain the base and floor before framing to make the application easier. Pre-drill holes to prevent wood splitting. Regular maintenance will extend the life of the dog house. Customize the dog house size based on your dog’s breed and ensure it is placed in a shaded area for comfort in all weather conditions. Remember the old saying, measure twice and cut once for accurate assembly.
Wrapping the Post with Sisal Rope
Now that you have selected the right materials and built a sturdy base for your DIY cat scratching post, it’s time to wrap the post with sisal rope. This step is essential to create a durable and engaging scratching surface for your cat. Sisal rope is a natural fiber rope that is known for its durability and texture, making it perfect for scratching. To wrap the post, start at the bottom and tightly wind the sisal rope around the post, making sure to cover the entire surface. Use a hot glue gun or strong adhesive to secure the rope in place at the beginning and end. Be sure to leave some space between each wrap to create texture and encourage your cat to scratch.
To add some interactive elements to your cat scratching post, consider attaching small toys or feathers to the rope. This will provide additional stimulation and play opportunities for your cat. You can use zip ties or strong adhesive to securely attach the toys to the rope. Get creative with the placement and variety of toys to keep your cat entertained.
Remember to regularly inspect the sisal rope for any signs of wear and tear. If you notice fraying or loose strands, it’s time to replace the rope to ensure the safety of your cat. By properly wrapping the post with sisal rope and adding interactive elements, you are creating a fun and functional scratching post that your cat will love.
Highlight: Durable and engaging scratching surface
Adding Interactive Elements
When building your DIY cat scratching post, consider adding interactive elements to keep your feline friend entertained. One option is to attach a small self-cleaning litter box to the base of the post. This provides a convenient and hygienic solution for your cat’s bathroom needs. Another idea is to incorporate a hanging toy or a dangling feather that your cat can bat at. These interactive elements will help stimulate your cat’s natural instincts and provide hours of entertainment. Remember to choose materials that are safe and durable for your cat to play with.
Crafting a Homemade Dog Toy

Choosing Safe and Durable Materials
When selecting materials for your DIY pet project, it’s important to consider the safety and durability of the materials you choose. Common materials for pet projects include wood, plywood, pallets, plastic, and metal. Each material has its own advantages and considerations. Wood is sturdy and provides good insulation, with cedar and redwood being naturally resistant to rot and pests. Plywood is an economical choice, but may not be as durable as solid wood. Pallets are a budget-friendly and eco-friendly option, but may require additional treatment for weather resistance. Plastic is easy to clean and resistant to rot, but may not offer as much insulation as wood. Metal is durable but can become very hot or cold depending on the weather, so it’s not commonly used for the entire structure.
Creating a Tug-of-War Rope Toy
To create a tug-of-war rope toy for your furry friend, you’ll need a few simple materials and some basic crafting skills. Start by selecting a strong and durable rope that is suitable for your pet’s size and strength. Braided nylon ropes are a popular choice for their durability and resistance to fraying. Next, cut the rope into two equal lengths, ensuring that they are long enough for your pet to grip comfortably. Tie a knot at each end of the ropes to prevent them from unraveling. For added durability, you can also wrap the ends of the ropes with duct tape or heat shrink tubing. Once your rope toy is ready, you and your pet can enjoy hours of interactive play and exercise together.
Making a Squeaky Plush Toy
Create a cute and interactive squeaky plush toy for your furry friend. This DIY project is a great way to provide entertainment and mental stimulation for your pet. Start by selecting safe and durable materials such as soft fabric and a squeaker. Next, follow a simple crochet or sewing pattern to create the toy’s body. Add stuffing to give the toy a soft and cuddly feel. Finally, insert the squeaker into the toy and securely close the opening. Your pet will love the sound and texture of their new toy, and you’ll enjoy watching them play and have fun. Remember to supervise your pet while they play with the toy to ensure their safety. Have a blast creating this engaging toy for your furry companion!
Designing a Puzzle Toy for Mental Stimulation
Designing a puzzle toy for mental stimulation is a great way to keep your dog entertained and engaged. Puzzle toys provide a fun and interactive challenge for your furry friend, helping to keep their mind sharp and focused. These toys are designed to stimulate problem-solving skills and encourage your dog to think and strategize. By hiding treats or kibble inside the toy, you can reward your dog for successfully solving the puzzle. This not only provides mental stimulation but also helps to prevent boredom and reduce destructive behavior.
When designing a puzzle toy, it’s important to consider your dog’s size and skill level. Choose a toy that is appropriate for your dog’s size and breed, and start with easier puzzles for beginners. As your dog becomes more experienced, you can increase the difficulty of the puzzles to keep them challenged. Variety is also key when designing puzzle toys. Try different types of puzzles, such as maze puzzles, treat-dispensing toys, or puzzle balls, to keep your dog engaged and entertained.
Here are some tips for designing a puzzle toy for mental stimulation:
- Choose safe materials: Make sure the materials used in the toy are non-toxic and durable to withstand your dog’s chewing and playing.
- Provide clear instructions: Include step-by-step instructions on how to solve the puzzle to help your dog understand what they need to do.
- Rotate puzzles: To keep your dog interested, rotate the puzzles and introduce new ones regularly.
- Supervise play: Always supervise your dog while they are playing with puzzle toys to ensure their safety and prevent any accidents.
Remember, designing a puzzle toy for mental stimulation is not only a fun activity for your dog, but it also provides important mental exercise and enrichment. So get creative and start designing a puzzle toy that will keep your dog entertained and engaged!
Crafting a Homemade Dog Toy
Conclusion
In conclusion, DIY Pet Decor offers a wide range of fun and functional projects for pet owners. Whether you’re looking to create a cozy cat house, a unique dog retreat, or even festive costumes for Halloween, there’s something for everyone. These projects provide an opportunity to showcase your creativity while also providing comfort and style for your beloved pets. With clear instructions and practical tips, you can easily create personalized and affordable pet decor that will make your furry friends feel right at home. So why not embark on these DIY adventures and give your pets the love and care they deserve?
Frequently Asked Questions
What materials do I need to create a cozy pet bed?
You will need a cardboard box, painter tape, extra cardboard pieces, a sharpie, an X-acto knife, Mod Podge, white cardstock, scrapbook paper, a hot glue gun, shells, and a Silhouette Cameo.
How long does it take to make a DIY cat scratching post?
The total time to make a DIY cat scratching post is approximately 2-3 hours.
What tools do I need to build a stylish pet feeding station?
You will need bamboo sticks, plywood for roofing, soil for a green roof, creeper plants, artificial turf, foam padding and bedding, a nameplate, and tools for cutting and assembling.
Are the DIY dog toys safe for dogs to play with?
Yes, the DIY dog toys are made from safe and durable materials.
Can I personalize my pet’s bed?
Yes, you can personalize your pet’s bed by adding their name or other decorations.
How can I add storage to the pet feeding station?
You can add storage for pet food and supplies by incorporating shelves or drawers into the design.